It won’t be wrong to say that string art is quite refreshing and the pretty hot one in the realm of crafts! I have made this breezy DIY string art for you folks to have a fun time making a classy wall decor! As the word is in the town that string art is making quite a comeback from the 70s. I am all set to welcome it with my set of nails, a hammer, a wood board, a funky string, and a pattern. Any pattern, literally! The best thing about string art is that it doesn’t require any special kind of skill, it is an excellent DIY project for any beginner too.
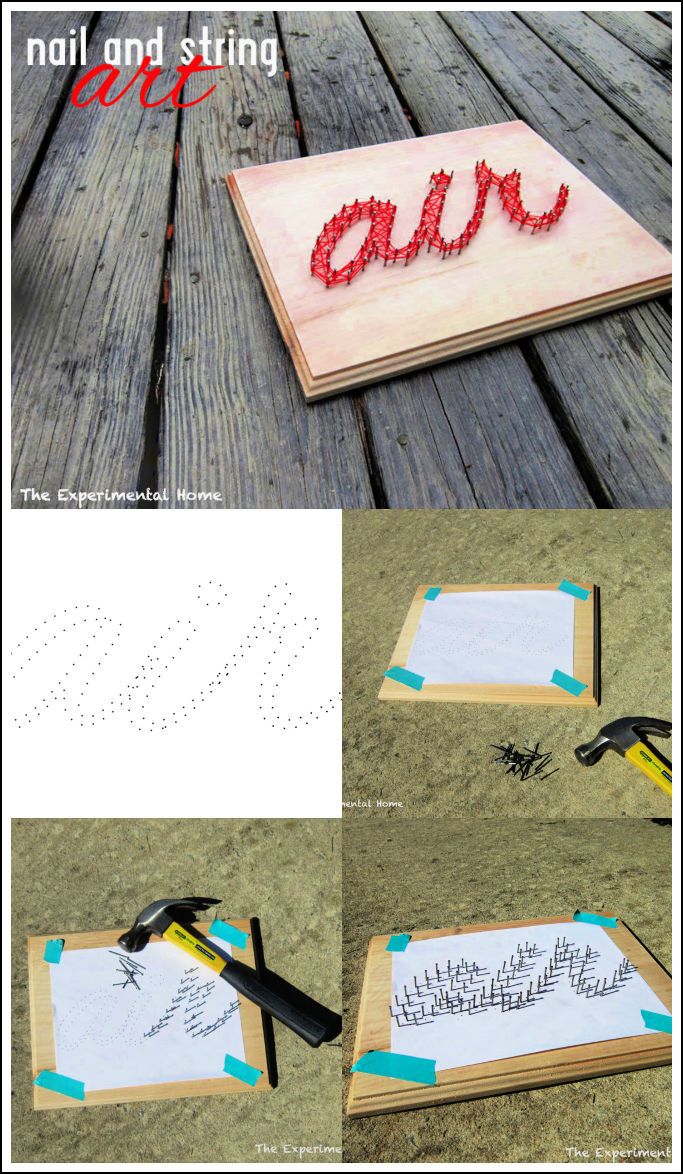
For my DIY string art, I chose this breezy and easy peasy “Air” craft! As, I love spending time outdoors! You know, I totally love the sunshine, blue skies, and the feel of fresh air! I find it quite the soulful voyage itself! Because, I wanted to make an accessory out of this experience, so it could always remind me to take a deep breath when things go left. And also cherish all the beautiful times I had spent outside with my family and friends! I did it with working on one simple word…. Air! So, I decided to try my hand (and hammer) at DIY string art with nails… and I love how it turned out.
There are just a few supplies that you will need, and by following these simple 5 steps, you can totally nail it!
Supplies For DIY String Art:
- A piece of wooden plaque, cut in your desired size. With or without stain.
- Computer
- A printer
- Adobe Illustrator or any good crafts software
- Tape
- Scissors
- Nails box from Lowes (quantity depends upon the size of your template or artwork)
- Hammer
- Crochet Thread
How to do string art?
First, you need to select a design or pattern for DIY string art! You can either search online or work on your existing inspiration! In my case, I wanted to make an “Air” sign, so I started out at my computer.
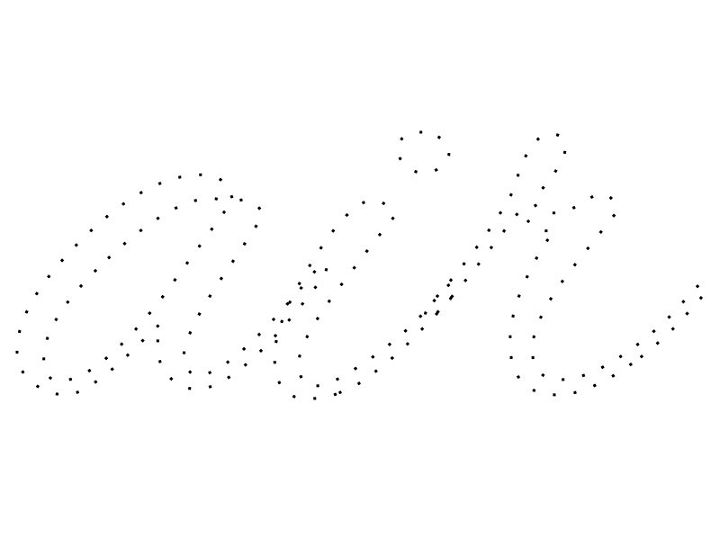
By picking out a font (you can download any font of your choice from google), next, I opened up an illustrator and took things there! I typed “air” with 700 pt. Letters. Then I dashed the line using 3pt dashes and 20pt gaps. Easy peasy just like that, I was all set to hit print, and in no time, I had a template.
String Art Template:
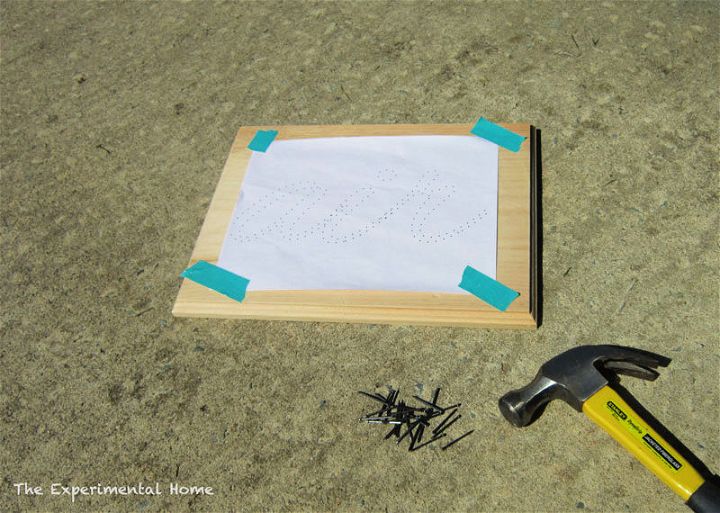
Next, on the wooden plaque that I got at the craft store, I positioned my pattern using tape for securing it temporarily.
From the box of nails, I got at Lowes and the hammer out of AMGP’s toolbox, I started pounding the nails lightly around my pattern. Stop. Hammer time.
Pro-tip; Try nailing each of them to possibly the same depth for an even piece of string art!
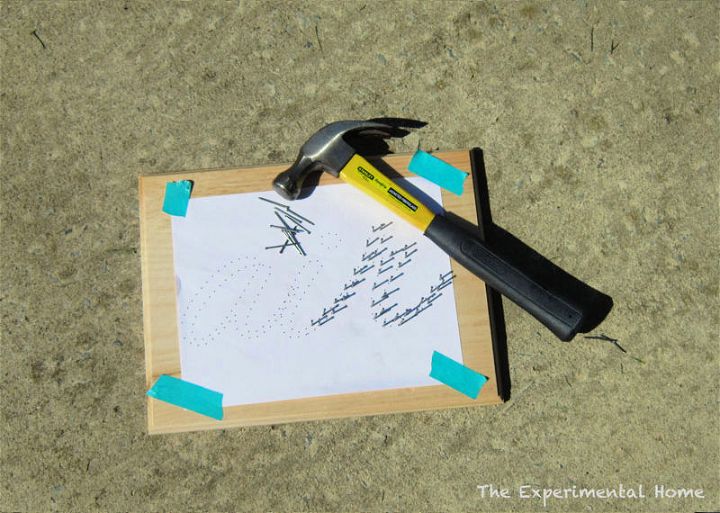
However, I ended up not quite using my template exactly, since some of the dots are really close together. I learned to hammer carefully and be sure to only hit one nail at a time.
If not, you will bend a nail. And let me tell you, it is hard to pull a nail out of the middle of all the other nails. I had to get a pair of pliers.
Once all my nails were in, and the shape of Air was clearly outlined. I ripped off the paper template and got to stringing! And I used size 10 crochet thread. I felt like the Goldilocks of threads… Using yarn could have been one option, but it would have been too thick! Same is the case with sewing thread, it would have been too thin, as well. And embroidery floss would have been quite difficult to deal with.
Start String Art Now:
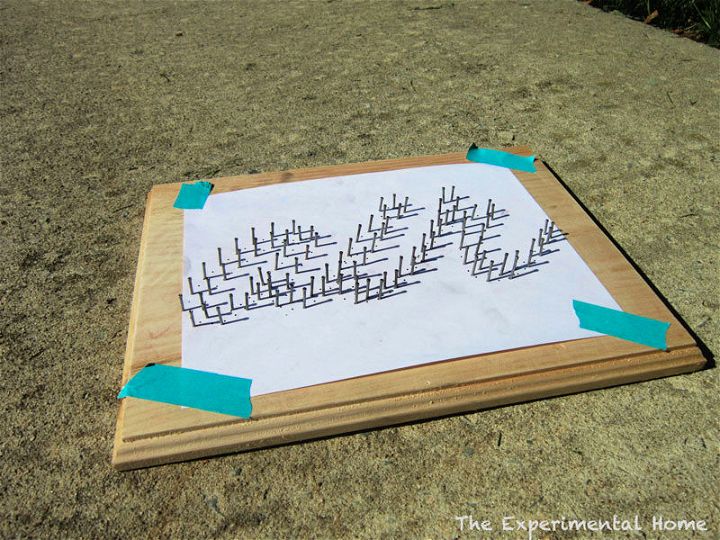
Now, comes the stringing! The key to a flawless DIY string art is to go around the border of the letters first! When I reached the corner and had to change the direction, I wrapped the string around each corner tightly and then changed the direction from one nail to the other. This is maintaining a steady shape!
After I carefully outlined the pattern, now was the time for the fun crisscrossing and filling in the pattern. I simply went from side to side and down a couple of knots, and it was done. Also, when my thread seemed like ending at one nail, I wrapped it all around there and started off with the new thread again from the same nail to keep the pattern going. Wouldn’t want to miss a zig in the zig zag, yeah!
Once all done, I clipped the tails of my thread to minus the messy look. And here is my nail and string art! Isn’t it just a breath of fresh air, don’t you think?
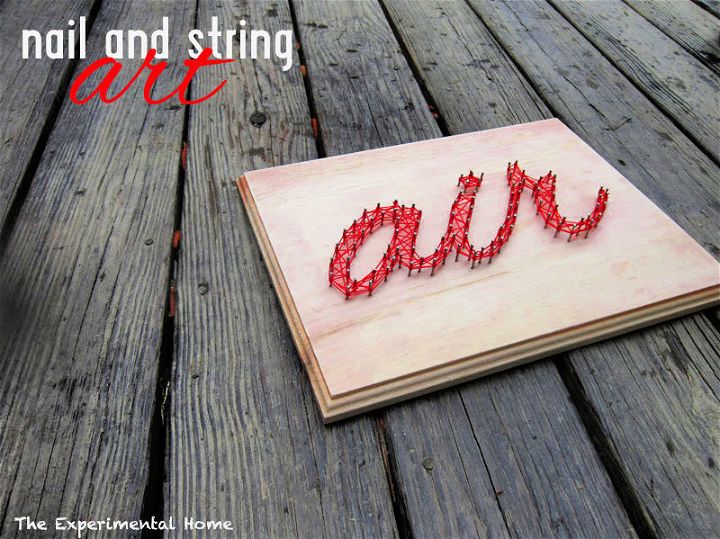
Anyone can make it in no time, and in such an inexpensive way, you can bring some charming vibes and character to your home decor! Just like I did. So, string on. What are you waiting for!
If you love my DIY string art project then you must share on your Pinterest!

