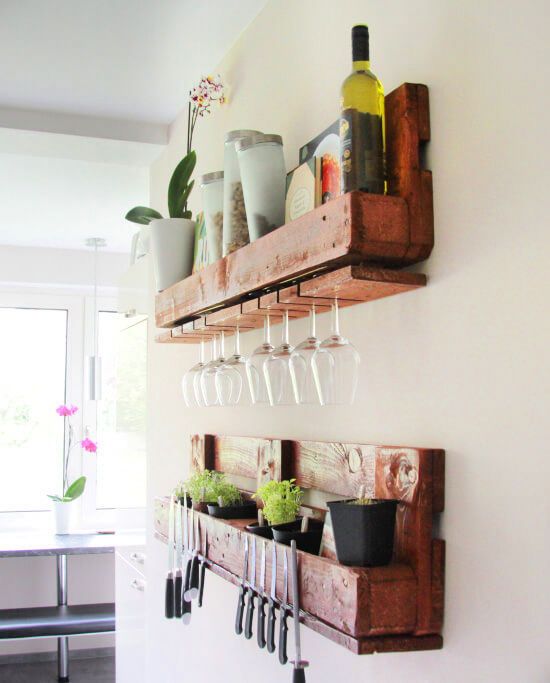
Hello, my fellow DIYers! So, I got behind the workbench again and built pallet shelves for the kitchen from a free EURO pallet, where you can hang up glasses and knives. Pallet furniture has been totally in for quite some time, now. I know that pretty clearly! As I’ve always made things with it and also find it totally fascinating! Because, well, such a fabulous trend has developed from these pallets! Since you can really make almost anything out of them! I suspect they are so popular precisely because it is so easy to make new furniture from them quickly.
Nevertheless, I always lacked the motivation to do something myself. So I once again rummaged through my beloved Pinterest to get inspiration and motivation. I came across shelves made from pallets. Since it would have been a bit boring for me just to build a shelf, I looked a little further. At some point, I saw a board with a lot of knives on it, held by magnets. And so this out of the box and an entirely unique idea really clicked me, I thought that I could combine the two and end up making something really fascinating!
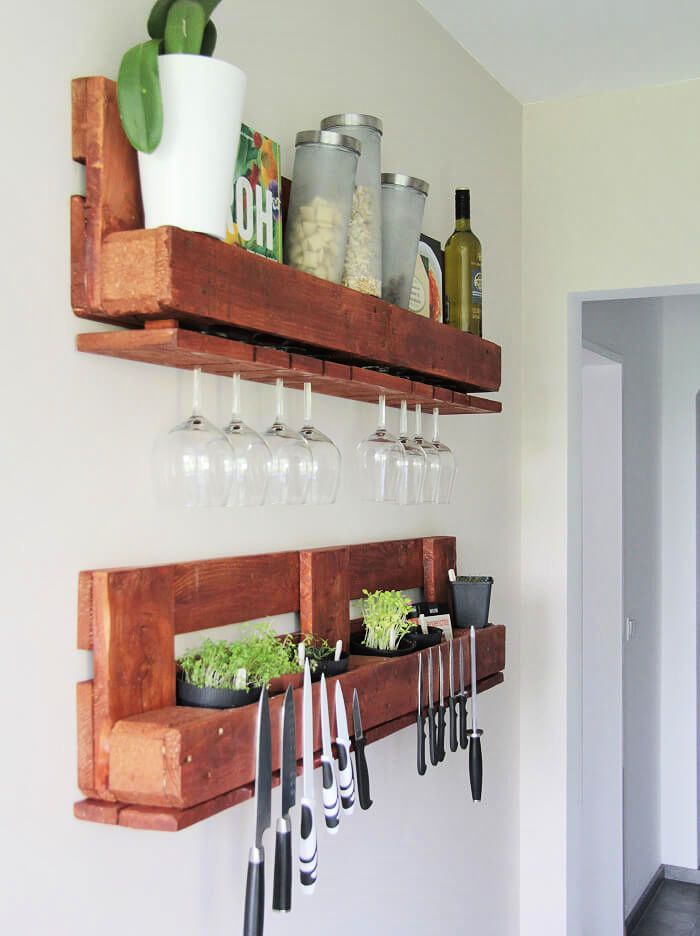
I think this project is the best example to literally portray how I sometimes just end up doing things that I would never do without going through an inspirational blog, first. Guilty as charged! I cannot even imagine that I would have built this shelf without exploring through the blog, which is not bad either.
I would never have thought of building furniture from old Euro pallets or let alone attaching my knives with magnets. But isn’t this one great thing about a blog? It brings something really great out of us, and you can’t imagine how proud I am of this shelf!
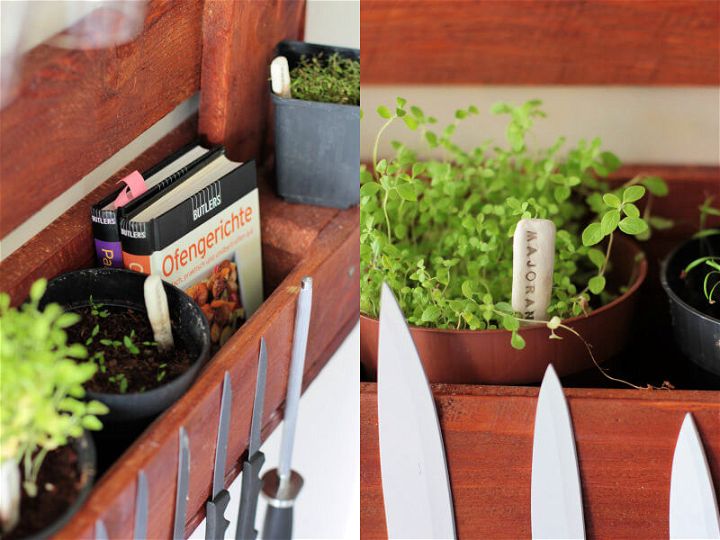
To celebrate the DIYer inside me with you all and also so that you can build your own shelf, I documented it step by step! And tried to describe it as understandably as possible. My basis was actually only two pictures, and I have mostly considered how I can best implement this.
But, before we go further with the step by step guide to building pallet shelves. Let me take you to the most basics! The questions you might have if you are being anywhere near to knowing nothing about pallets like me! So let’s start by knowing the basics first!
What is a pallet, really?
A pallet has a flat structure, or it can also be called a horizontal platform. It is mainly used to transport materials safely from one place to another. Because of its ability to affix the structure, it is quite favorable for transporting things in an uber stable manner. However, over time, wooden pallets have also been used as a piece of great DIY furniture or wooden decor supply.
Where to get pallets?
Wood pallets are usually free to obtain! You can hit the search off by using the internet and searching for pallets nearby you. Mostly, you can find them at companies who are disposing of their waste materials or waste pallets. You can find them at a Home Depot store or search online for places or people who have pallets for sale!
How to disassemble a pallet?
The simplest way to tear down or disassemble a pallet is to do so by using a reciprocating saw. Go with a 12″ long blade, and I bet it can reach the awkward corners too and help you disassemble it easily. If you are more of a manpower kind of person, a hammer and a pry bar can work also.
How to paint wooden pallets?
If you are looking to add a retro effect to your pallet, here’s how you can paint it. You will be needing a sander to smooth the surface. Clean the wood thoroughly, then use a chip brush to paint, but before painting, for a smooth finish, apply primer at first!
Now that I have covered the most basic questions that you might have let’s move ahead to my amazing pallet shelves made from a One Euro Pallet! I believe these questions can answer all that you need to know about pallets and how to really work around them! In case if you don’t want to have a rustic look, that’s why I have also covered the painting wooden pallets part.
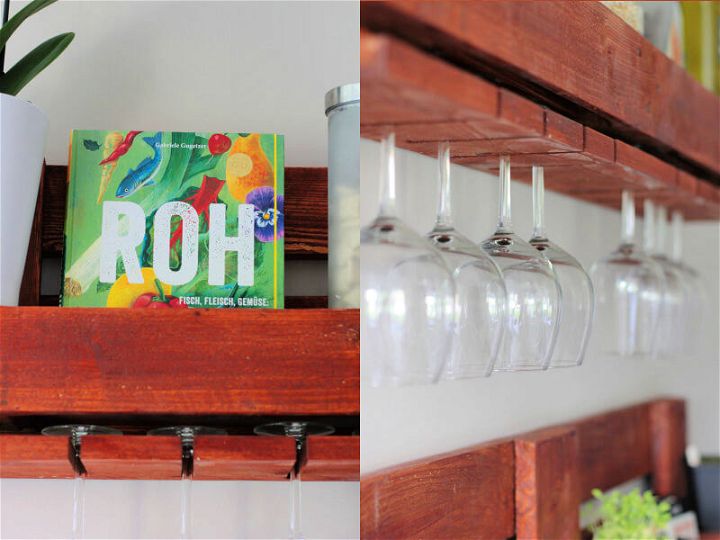
The Whimsical Pallet Shelves for Kitchen:
Anyway, back to the pallet shelves. Let me first share with you the supplies you will need for nailing this beautiful piece of decor to your kitchen wall.
Required Supplies:
- Wooden Pallet
- Hammer
- Nails
- Reciprocating saw (for separating the pallets apart)
- A manual saw
- A spare piece of wood (just in case)
- Sander
- Paint and Primer
- Paintbrush
Step-by-Step Guide:
The first 4 steps are the same for both shelves. Then there is an individual manual for each shelf, as below. Also, I have made it as comprehensive as it could get. So, if like me, you too need to know how easy it really is to make you go for it, I have got you covered! *wink*
Separating the Pallets:
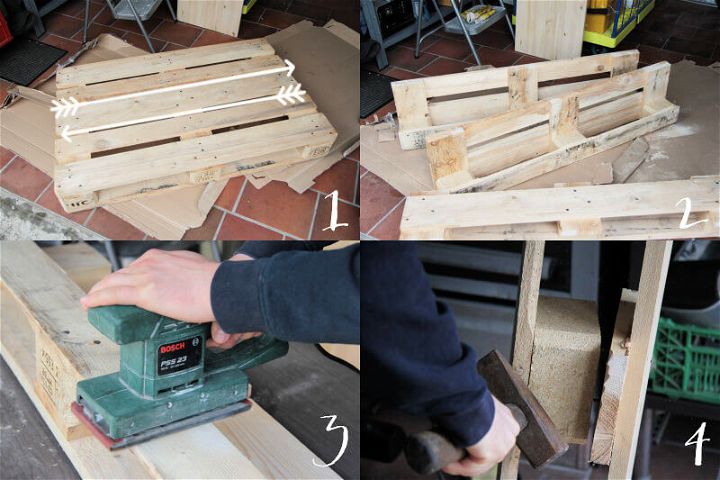
1. Separate the pallets with a jigsaw where the arrow marks run.
2. Then, your two shelf pieces should look like two separate boxes, as shown in image 2.
3. Next, sand the entire shelf thoroughly so that you don’t get splinters later.
4. There will now be two boards left from the rest of the pallet. Detach them from the pallet too. They will become our floor later for these pallet shelves.
Shelf with Hanging Glasses:
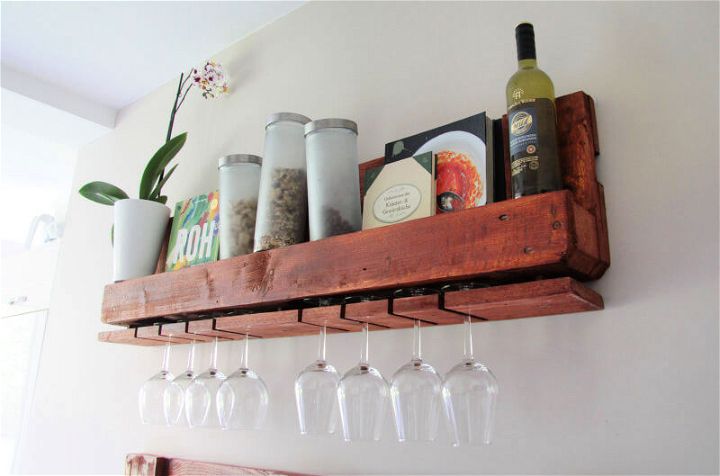
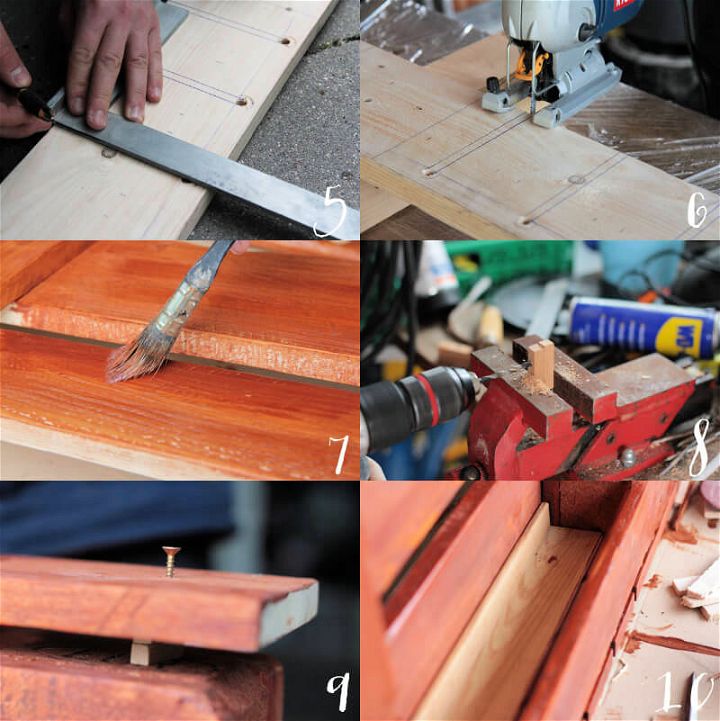
5. For the “pallet shelf for glasses,” I first took the board that I have removed from the pallet (as above). Here we measure the distance so that at the end, 8 glasses can be hung on the shelf. Then we pre-drill eight holes, at the level where our notches are later. (As in the picture) We also drew the lines (where we will later use saw into the wood for the notches.)
6. Then, use the saw along the marked lines. Take a wine glass and check whether the notch is wide enough or not.
7. Then, paint the shelf and let it dry thoroughly.
8. To be able to hang the wine glasses on the shelf later, I figured we will need some distance between the shelf and the floor. For this, you can simply take small wooden blocks and pierce them once in the middle.
9. Now drill a hole in the board for the floor and then fix the floor with the wooden blocks in between on the shelf.
10. This is so that you can also put something on the shelf, you will need a board that you can use as the floor for this shelf. Also, to start off, make sure that it has the dimensions of the bottom of a shelf. You can then simply attach that to the back of the shelf. (I used an old bar for this.)
Shelf with Magnetically Hanging Knives:
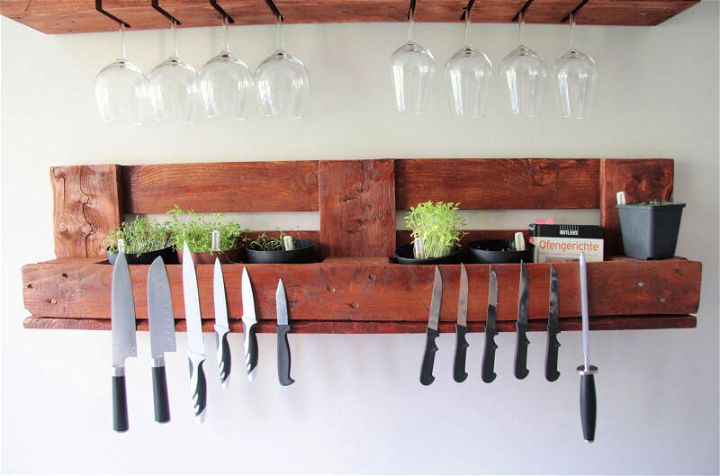
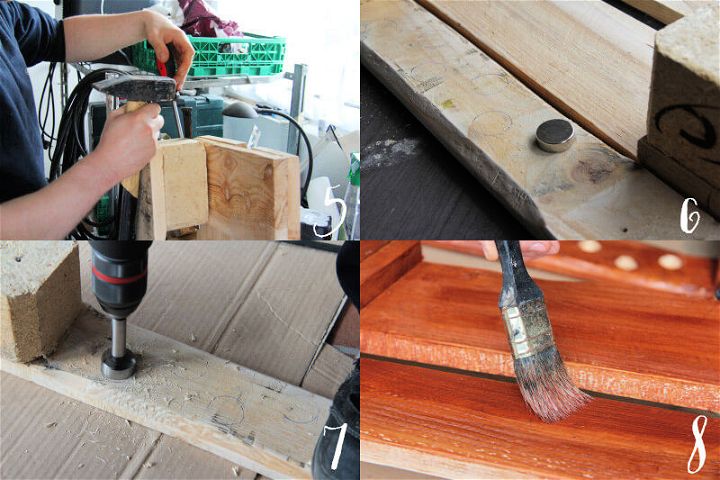
5. For the “knife magnet shelf,” detach the front board from the shelf with a hammer. (The board on which the knives will hang later.)
6. Now, mark the position of the magnets on the back of this board so that the hollow spaces can be fixed with a saw properly later. Draw them offset to make the force is evenly distributed, later.
7. Now, drill the holes on the markings using a Forstner bit (or a knothole drill).
8. After that, paint the shelf with a color of your choice and then let it dry well.
Final touches with Paint:
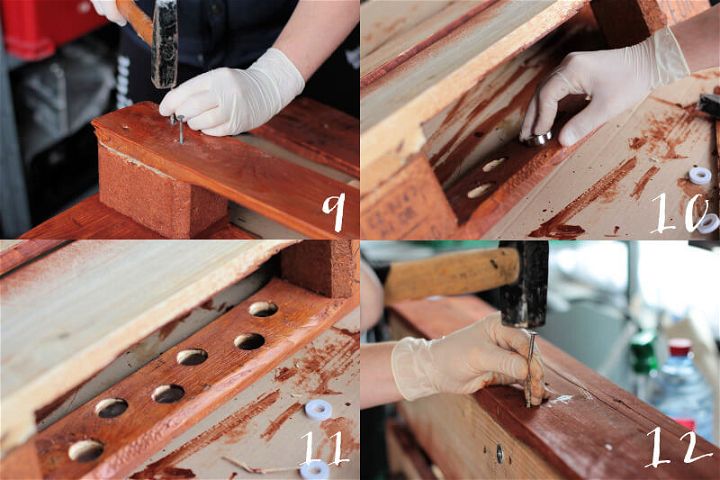
9. When the paint has dried well, nail the board back to the shelf.
10. Then, insert the magnets into the recesses. Make sure that you cover the magnets that are already on the board with your hands! This is to make sure that the other magnets that you will insert are not attracted to these already attached magnets. It might sound funny, but in practice, it really is not so amusing then to get the magnets off each other again.
11. The whole thing should look something like the one in the pictures above.
12: Finally, fix the other board, which we detached from the rest of the pallet to the bottom of the shelf with nails. And it’s all done!
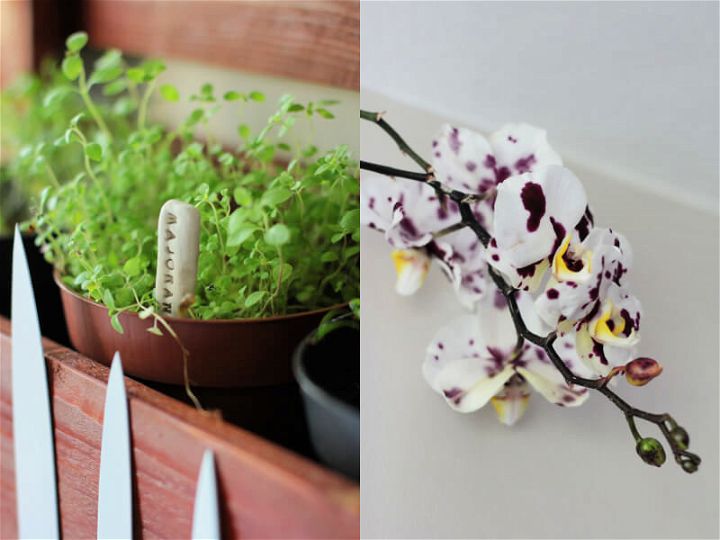
A Magnetic Revelation:
I would also like to confess something about the magnets: The magnets I got really lived up to their magnetics! Because the magnets were so strong that I really struggled to get them apart in the first place. Not just that, when I tried to pull them apart, I even tore a small piece of skin from my finger. No Kidding! It was quite an onion, but it wasn’t that bad. But now I can be sure that the knives will stick to it and that’s the main thing, right?
By the way, if you would want to alter the design of the pallet shelves, I am sure you can find even more inspirations! About what kind of furniture can be made with magnets on the wide realm of the internet! So, do hit more search if you feel like it!
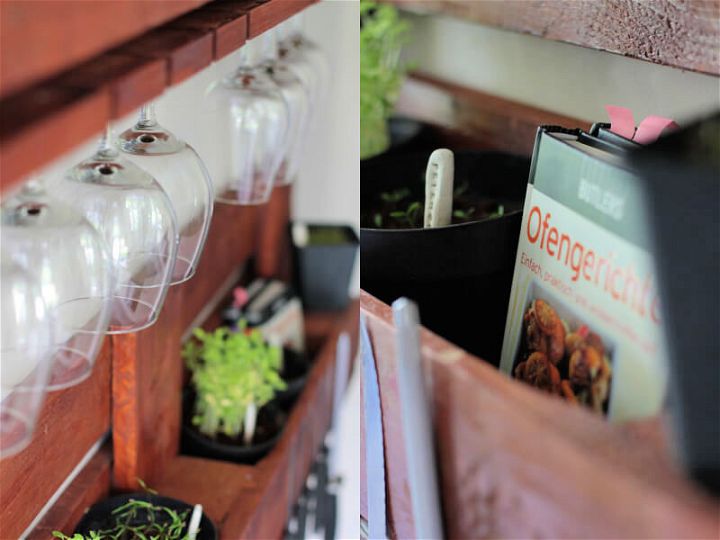
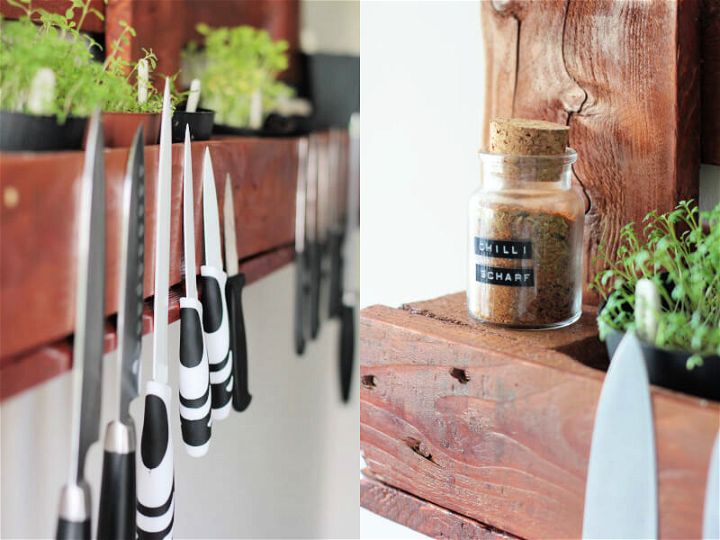
(Save this post to your Pinterest board and try later)

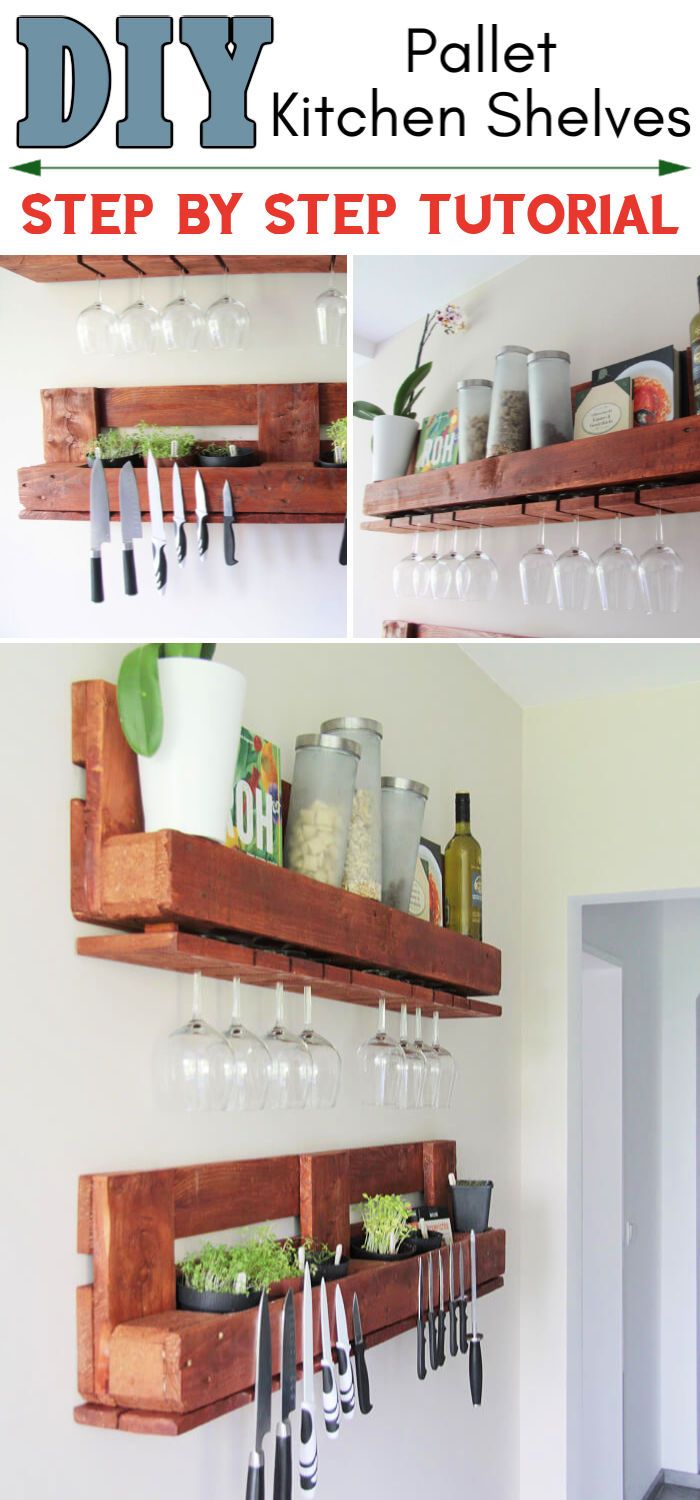
Of course, it would all have been nothing if I hadn’t made an effort to do some decor hunt online in the first place! I just want to quote my friend here: “It’s just so quick. You saw through once and have almost a whole piece of furniture!” You may also find more inspiring shelf ideas that you can build with free pallets.
And finally, I advise you to do it with someone who is skilled in the art. My friend often had to do the more difficult things that required a lot of strength and skill. I probably couldn’t have done it alone! Thanks for that.
What about you? Have you ever made furniture from pallets? And if so, what have you built? Because, well, sharing is caring! And, who knows we all just might end up with some really cool decor inspirations for each other, yeah?!
Also, Do you’ve chickens?— it’s easier than you think to build your own coop! Check out this easy to build a DIY chicken coop with a detailed guide.

